Posts

Showing posts from April, 2013

Kindergarten Flowers!!!!!!!! Yay For Spring!

Image
Each Kindergartener looked at three flower pictures to start the class. They picked two of the three to draw. As a whole class, we drew each flower one at a time. If a student didn't pick the flower I was drawing at the time, they waited patiently for me to get to their next flower. The students did an awesome job of listening to the instructions and we ended up with some awesome painting. After the drawing, the students painted the sky with watercolor, and the flowers with tempera paint. In their regular ed. classroom, the students were learning about roots, so I decided to show an above ground and below ground view.  The roots are colored with crayons, and the dirt painted with brown watercolor. I love how different they all are!

Horizon Line / Flowers

Image
My first graders learned about the horizon line on a landscape. They started out by painting one piece of paper green and another piece of paper blue.  The students tore both pieces of paper into little pieces. They glued each piece onto a long piece of paper with a line drawn horizontally across the middle. Blue (sky) goes above the line and Green (ground) goes below the line. After all pieces were glued to the paper we drew flowers onto some colored paper and tore the flower pieces out. TORN FLOWERS... hard but every student learned a lot from it and did an amazing job.  

CUBISM In a New Format

Image
  My fourth graders learned how to draw different facial features, while learning a little bit about Cubism at the same time. We drew two versions of each facial feature (each version was from a different angle/ profile) as a class.  Before we started drawing, the students picked from ten different sized pieces of paper. After we finished all the drawings, the students colored the facial features in with colored pencils. After the coloring was finished, they took paper from the scrap box and matted their facial features with multiple colors. The students finished the lessons by gluing the features to a large piece of construction paper in a curious, and peculiar way.  This lesson was a huge success! It offered me a chance to talk about another art style, while allowing me to teach portraiture. 

First Grade Weaving... Desert Day and Night

Image
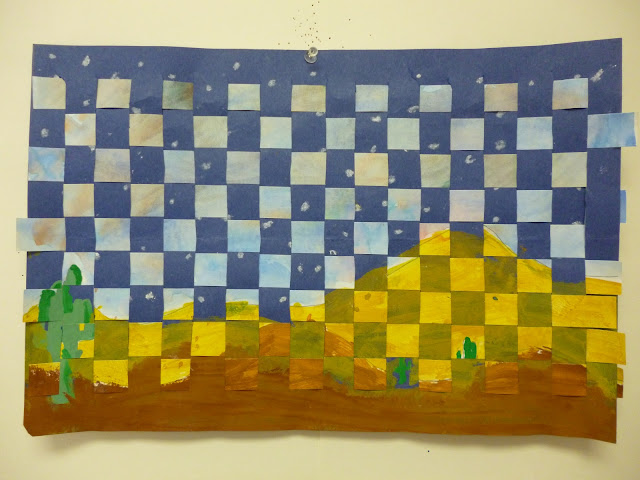
WOW! I was approached by one of my first grade teachers with an idea to incorporate landscape / and the desert into a lesson. Well ...because I don't like to take the easy approach, I thought, why not add weaving and constellations into the lesson to make things more complicated. My students started out by drawing a dessert landscape on a piece of blue construction paper. After they finished the drawing on the blue paper, they traced it onto a white piece of paper. The blue piece of paper becomes the night image, and the white piece of paper the day image.  The students mixed up their own light and dark browns for the sand. The  sky on the day painting was done with watercolor using a "wet-on-wet" technique. The night painting, gave me an opportunity to incorporate another science lesson involving constellations. The weaving covers up a lot of the stars, but the students did an amazing job creating O' Ryan's Belt, The Big Dipper, Small Dipper, and

Shape Alien Prints (Year Two)

Image
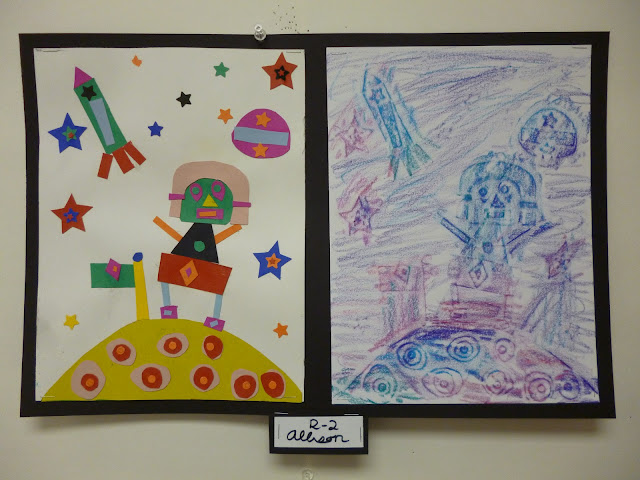
Crayon Cake Print Example    Black Crayon Rubbing / Print Example Black Crayon Print With Watercolor Example  My Second graders just finished their Shape Alien Prints. I repeated this lesson this year because I loved the fundamental skills used throughout the project : proportion, cutting, shapes, landscape, gluing,  cutting, layers, printing, watercolor, drawing, and CREATIVITY! The students start out by drawing an alien using only shapes. We talk about layers and how to draw layers on flat paper. The students finish their drawings with a background and landscape. The next class I hand the students a white piece of tag board (same size as their drawings), and boxes of multiple colored tag board pieces. The students recreate their drawings using cut up tag board. After the printing plate was created, the students did two black crayon rubbings,  and a crayon cake (melted crayons) rubbing. They took one of the black crayon rubbing prints and painted it with w