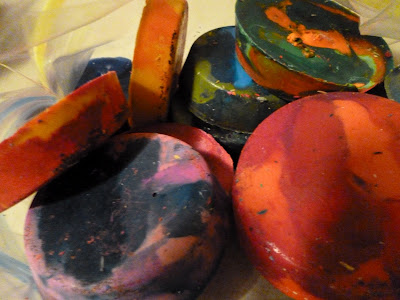
Crayon cakes... :)

 Step 1: place broken and pealed crayons in an old cupcake tin.
Set oven to 300 degrees and watch them melt.
 Step 2:
When crayons are fully melted, take them out of the oven and let them cool.
When cooled... take a knife and push it down one side as if to let air under the crayon cake. The cake will pop out.
 Step 3:
Enjoy!!!!
Crayon Cakes are great for the younger ages when they do crayon rubbings. The crayon cake shape is great for a young child's hands. I will be using them in an upcoming lesson. The students love the fact that they rub the crayon cake and it rubs one color, then all of a sudden it rubs two different colors. I made warm and cool colored crayon cakes in this batch. I have a couple other batches of just random colors (the students really like these ones). If you are one of the many art teachers that use and make their own crayon cakes, let me know if you do anything different when making them. If you don't use them.... TRY THEM!


I use a silicone mold to melt my crayons in. They pop out very easily since the mold is flexible. I have a toaster oven in my classroom (for shrinky dinks, etc.), so I melt them right in my room! I let the students each "make" their own recycled crayon when the class reaches 10 stars on my good behavior chart. I tell them to use an analogous color scheme so we don't get any ugly colors when the crayons melt together.
ReplyDelete~Jessica (missyoungsartroom.blogspot.com)